hexo+github pages 静态页面 速度杠杠的
#环境
Node.js Git
GitHub Pages创建
很多种GitHub Pages,这次创建的是个人id顶级pages New repository,项目的名字就是username.github.io 其他选项不再详细赘述,比较简单
配置SSH Keys
(不知是否可以使用github自己客户端的git,自动生成ssh key,可以的话就跳过这步) 现有ssh key check
$ cd ~/.sshNo such file or directory 说明没有创建 如果有,请删除,个人文件夹(C:/Users/username/)下的.ssh文件夹
生成新的SSH key
$ ssh-keygen -t rsa -C "邮件地址@youremail.com"
Generating public/private rsa key pair.
Enter file in which to save the key (/Users/your_user_directory/.ssh/id_rsa):
-C大写注意 回车后系统要求输入密码,输入即可 可以不设置

添加SSH key到GitHub
要把SSH key添加入GitHub才能正常pull/send requests
- 打开.ssh文件夹下的.pub文件,用notepad/notepad++等编辑器打开
- 登陆github,进入
Account Settings->SSH Public Keys->add another public keys - 把刚才的pub文件内容复制进key文本框中,点击add key
测试
输入以下命令:
$ ssh -T [email protected]出现以下情况表示配置正确:
The authenticity of host 'github.com (207.97.227.239)' can't be established.
RSA key fingerprint is                                                    .
Are you sure you want to continue connecting (yes/no)?
输入yes
Hi xingoxu! You've successfully authenticated, but GitHub does not provide shell access.完善个人信息
$ git config --global user.name "cnfeat"//用户名
$ git config --global user.email  "[email protected]"//填写自己的邮箱
配置成功
常见错误参考
GitHub Help - Generating SSH Keys GitHub Help - Error Permission denied (publickey)
开始使用hexo部署博客
安装hexo
$ npm install hexo-cli -g部署hexo
找个地方新建个文件夹,右键git bash
$ hexo init然后尝试执行
$ hexo g
$ hexo s
如果出现错误,尝试重新执行 npm install hexo-cli -g 成功后可以在浏览器中查看到localhost:4000
使用/调试
$ hexo sor
$ hexo server每次执行
$ hexo clean
$ hexo g
$ hexo deploy
deploy/d 是部署到github 但前提是首先我们要配置hexo
配置
首先安装
$ npm install hexo-deployer-git --save否则不识别git上传方式
然后配置根目录下_config.yml
deploy:
type: git
repository: [email protected]:A-limon/alimon.github.com.git #此行内容可以在没有部署项目的项目首页找到,点击SSH
branch: master #为不同项目创建,参考其他资料

# Site #整站的基本信息
title:  #网站标题
subtitle: #网站副标题
description:  #网站描述
author:   #网站作者,在下方显示
email:  #联系邮箱
language: zh-CN


# URL
## If your site is put in a subdirectory
url: http://www.cnfeat.com #你的域名
root: /
permalink: :year/:month/:day/:title/
tag_dir: tags
archive_dir: archives
category_dir: categories
code_dir: downloads/code
这么多差不多就配置好了 要注意的是hexo的配置文件,冒号后面一定要空一格空格,字符串后面也要空一格空格
安装主题
$ git clone https://github.com/wuchong/jacman.git themes/jacman$ git clone https://github.com/A-limon/pacman.git themes/pacman启用主题
_config.yml中
theme: jacman更新主题
$ cd themes/jacman
$ git pull
注意备份主题_config.yml
安装插件
$ npm install <plugin-name> --save安装sitemap与feed插件
$ npm install hexo-generator-sitemap --save
$ npm install hexo-generator-feed --save
修改_config.yml,增加以下内容
# Extensions
Plugins:
- hexo-generator-feed
- hexo-generator-sitemap

#Feed Atom
feed:
  type: atom
  path: atom.xml
  limit: 20

#sitemap
sitemap:
  path: sitemap.xml
主题中有相应部分也要做出修改
设置CNAME
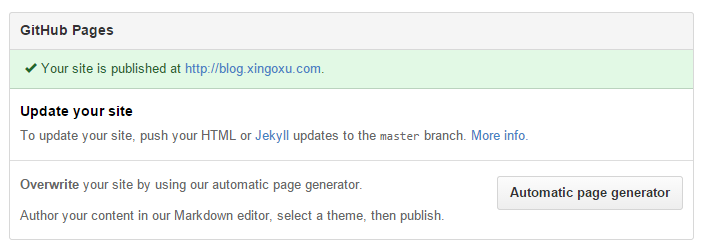
在sources文件夹新建一个CNAME文件,内容是一行无空格一个CNAME域名 这样做的目的是可以使hexo generate的时候把cname放进网站根目录下 当github项目中的设置中这样显示的时候,证明设置成功
当你使用非cname,想使用A域名等,请看这里: Setting up a custom domain with GitHub Pages - User Documentation 最后不要忘记在你的ns服务商中设置cname哦
拾漏补遗&技巧
\scaffolds\post.md进行修改,可以更改默认发布模板 例如:
title: {{ title }}
published: {{ date }}
tags:
  - Uncategorized
description:
---
pacman 主题启用公式高亮 要在pacman的_config.yml中最后加入
highlight:
  enable: true
p.s.听说pacman还不支持3.0(?)
Reference
参见以下作者文章,感谢他们的努力!:
如何搭建一个独立博客——简明Github Pages与Hexo教程 Pacman主题介绍 如何使用 Jacman 主题 Migration | Hexo Permalinks | Hexo